TL;DR: Server rack cable management is the system that keeps every patch cord, fiber, and power cable routed, labeled, and supported so maintenance stays fast and airflow stays clear. Good server rack cable management follows 10 rules: plan the layout first, match cable managers to panels, use hook-and-loop instead of zip ties, label both ends to TIA-606-C, and leave service loops. Follow them and any engineer can read your rack in minutes.
Quick answer: Server rack cable management means routing, securing, and labeling every cable in a rack with a plan: patch panels next to the switches they feed, a cable manager between each pair, hook-and-loop instead of zip ties, labels on both ends, and service loops stored neatly. Follow the 10 rules in this guide and any engineer can read your rack in minutes.
Server rack cable management is the practice of planning, routing, securing, and labeling every cable in a rack, so the system stays easy to maintain, easy to expand, and easy to cool. It covers copper patch cords, fiber, and power inside the cabinet, plus the labels and records that tell you what each cable does.
Done well, any engineer can trace any cable in seconds, add new links without breaking old ones, and keep air moving through the rack. Done poorly, you get accidental disconnects, blocked airflow, and slower repairs. Uptime Institute research attributes 66 to 80 percent of data center outages to human error, and an unreadable rack makes that error easier.
We've manufactured patch cords, patch panels, and cable managers since 2006. This guide packs that floor experience into 10 rules with real numbers: the 1U-per-2U rule for cable managers, the 300 mm label rule from ANSI/TIA-606-C, the 4x bend radius for copper patch cords, and a blanking-panel case that saved $137,395 a year.
What this guide covers:
What server rack cable management is, and the five outcomes it protects
Why racks turn into spider webs, and how to stop the cycle
Layout rules: panels, switches, and the 1U-per-2U manager ratio
Hook-and-loop vs zip ties, with the bend radius numbers
Separating fiber, copper, and power in one rack
A label scheme you can copy, per TIA-606-C
The real cost of a messy rack, in dollars
Hardware selection: horizontal, vertical, and securing gear
A safe cleanup routine for an already-messy rack
What changes in AI and high-density racks
A 10-step routine plus 5 mistakes to avoid
1. What Is Server Rack Cable Management?
Server rack cable management is the practice of planning, routing, securing, and labeling every cable in a rack, including copper patch cords, fiber, and power. Its goal is not a tidy look. Its goal is a rack that stays maintainable, scalable, and cool for years.
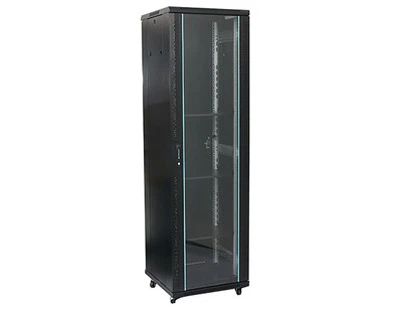
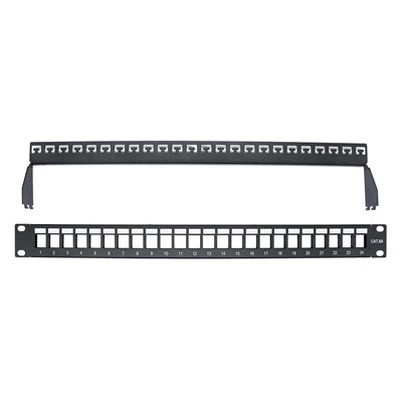
Start with the parts. A managed rack is a chain of components: server rack cabinets, patch panels, cable managers, patch cords, labels, and records. The chain only works when every part does its job.
Each part serves one of five outcomes:
Maintainability. Anyone can find and trace a cable without guesswork. A fault that took an afternoon now takes minutes.
Scalability. New links slot in without disturbing old ones. Growth stops being a rewiring project.
Airflow. Cables never choke the paths air needs to move. Equipment runs at the temperature its fans were designed for.
Traceability. Labels and records tell you what each cable does. The rack survives staff changes without losing its story.
Cable safety. No crushed jackets, no sharp bends, no hanging weight on connectors. Links keep their rated performance instead of degrading quietly.
Skip the discipline and the rack still works on day one. But the damage shows up later. Airflow guides keep repeating this because it's true: blocked cables trap heat, and trapped heat turns into thermal shutdowns and shorter equipment life.
Think of it as one layer of structured cabling in a data center. The rack is where that big system gets touched by human hands, so it's where discipline pays off fastest.
It also helps to say what cable management is not. It's not the bundle of cords zip-tied into one fat sausage. It's not cords trimmed so tight they hum when you touch them. And it's not a one-time project that stays done. A managed rack is a set of habits that runs for the life of the cabinet: every install follows the plan, every change gets recorded, every audit catches drift early.
Who feels the difference? Almost everyone who touches the network. IT managers feel it in downtime and audit time. Installers feel it in how fast a change goes. Finance feels it in cooling bills and equipment that lasts its full life instead of dying hot. The rack is shared property, and its wiring discipline shows respect for the next person's time.
2. Why Do Server Racks Get Messier Even When You Start Out Organized?
Racks don't get messy at installation. They get messy through changes: a new switch here, a camera there, an extra port for one office. Each quick patch cord that skips the plan breaks the tracking system, and the mess compounds.
The pattern looks like this in real life. Today someone adds a switch. Tomorrow it's a few cameras. Next week an office needs two more network ports. The technician wants service back fast, so they grab the nearest cord and plug it in. One cord runs left around the rack. Another crosses back to the right. A third goes straight across the front.
The visual mess is the small problem. The real damage is that link relationships become impossible to trace. Uptime Institute's outage research keeps finding that human error drives most downtime, and an unlabeled rack is an error waiting to happen.
Picture the failure. A switch dies, and every cord on it is unlabeled. With ten cords, you can trace them by hand in minutes. With two hundred, someone spends the afternoon pulling cords and praying. That's the bill for every unplanned cord.
So change your mindset before you touch a single strap. Cable management is not the cleanup at the end of a job. It's part of building the network, the same as racking the switch itself.
There's a quieter force at work too: fear. In an old rack, nobody wants to pull that one mystery cord, because it might feed something nobody remembers. So the cord stays. Then ten more like it stay. Each one was "someone else's problem to confirm," and each one now blocks the view of the cords that matter. That's how a rack keeps its spider web even after every technician agrees it should go.
The mess also has a maintenance ladder. At ten cords, one person traces by hand and loses ten minutes. At a hundred cords, tracing needs two people and a port table, and the rack stops getting fixed because nobody has the afternoon. At three hundred cords, changes get scheduled like surgery, and "just add one port" becomes a project. Every rung up that ladder costs more than the label that would have prevented it.
It helps to see the three kinds of change coming, because each one breaks the rack in its own way. Adds bring new devices, and their cords take the shortest path because no lane exists for them yet. Moves shift equipment, and half-reconnected cords leave the plan mid-route. Upgrades swap gear for faster models, and the old cords stay behind because they still "work." A plan that only covers day one fails all three. The rules in this guide are written for the changes, not the install, because that's where racks are actually won or lost.
3. Where Should Patch Panels, Switches, and Cable Managers Sit in the Rack?
Keep each patch panel directly above or below the switch it feeds, and put a horizontal cable manager between every panel and switch pair. Add vertical managers on both sides of the rack so every bundle gets its own path from entry to end point.
This one layout rule does most of the work. Panels and switches carry most of the connections, so they belong close together. A cord that leaves the panel enters the horizontal manager right next to it, rides a short fixed path, and lands in the switch port. It never crosses the rack, and it never dangles in front of other gear.
For the ratio, rack manufacturer Chatsworth Products gives a simple rule: plan 1U of horizontal cable management for every 2U of connectivity, with bundles filling at least half the manager's capacity. A 48-port panel paired with a 2U manager is the common translation.
The rack sides matter too. Vertical channels on the left and right give every bundle its own lane. Cords enter the cabinet from the top or bottom entry points, ride the vertical channel, then peel off to their panel. Nothing crosses the middle.
Here's the visual test we use. A beautiful rack is not one giant bundled sausage. It's many small bundles, and each one has its own path. When you can see the paths, you can keep them.
New links then follow the same roads. That's the whole trick: the layout survives changes because every future cord already knows where to go. If you're weighing a cable manager against another patch panel, remember they do different jobs, and the rack needs both.
Here's how that looks in a full 42U cabinet, top to bottom:
U1-U2: fiber panels or ODF, since fiber wants the shortest, gentlest path off the top.
U3-U6: copper patch panels, one row per wiring zone.
U7-U10: access switches, each directly under the panel row it feeds, with a 1U horizontal manager between each panel and switch pair.
U11-U38: servers, storage, and other gear, each fed from the vertical channels on both rails.
U39-U42: PDUs, one per power side, so A and B feeds stay physically apart.
Flip it for your room if you must, but keep the two invariants: a manager position between every panel and its neighbor, and nothing crossing the middle of the rack. A rack that holds those two rules stays readable even when every U is full.
Watching someone apply these layout rules makes them stick, so here's a full rack build walkthrough from TCI Productions that shows panels, managers, and patching coming together in order:
Video: Learning Network Cable Management - A Small Business Open Frame Rack Build, by TCI Productions (17:22, YouTube). Watch at: https://www.youtube.com/watch?v=KkIgYbLuA6o
4. Hook-and-Loop or Zip Ties: Which Straps Should Hold Your Cables?
Use hook-and-loop (Velcro) straps for data cabling. Over-tightened zip ties crush the cable and deform the twisted pairs inside, which hurts signal quality. Hook-and-loop holds bundles firmly, can't really over-tighten, and opens cleanly for the next change.
The physics is simple. A Cat6 cable is engineered down to the millimeter: four copper pairs, each twisted at a precise pitch. Squeeze that bundle hard and you change the spacing between pairs. Installers who have measured this report pinched cables with worse return loss, packet loss, and even broken conductors. The damage hides under the jacket, so you won't see it until a link fails a test.
Fiber raises the stakes on every strap. A fiber connector that carries the weight of a drooping trunk will work itself loose over months, so the route, not the ferrule, must hold the load. Keep fiber bundles loose enough that a strap never dents the jacket, support the run at intervals along the vertical channel, and never hang a fiber bundle from the connectors at the panel. Ratchet-style tensioning tools belong on power cables and cable trays, not on data bundles, because they tighten to the same force whether the bundle holds five cords or fifty.
The same "gentle" logic applies to slack. Don't stretch cords dead straight between two points. Cords need room to move when a switch gets pulled for service. The professional standard is fixed but with slack, tidy but movable. Store extra length as a service loop along a vertical channel, never as a coil stuffed behind the equipment.
Here's the choice side by side:
Hook-and-loop
Zip tie
Crush risk
Almost none: fabric stops before damage
Real: tension easily exceeds what pairs tolerate
Reuse
Opens and closes hundreds of times
Cut once, then it's trash
Bundle changes
Add or remove cords in seconds
Cut and re-tie every time
Fiber safety
Gentle by default
Requires careful hand tension
Cost per strap
A bit more up front
Pennies, but single use
Best use
Every data bundle
Frame parts, permanent non-data runs
5. How Do You Separate Fiber, Copper, and Power in One Rack?
Give each cable family its own path: fiber on its own route with proper bend protection, copper on its side, and power on the opposite side from data. Never share one channel for all three, and never pile power cords behind active gear.
Fiber first. Optical patch cords look light and harmless, but they punish carelessness in two places: the glass and the connector. A single fiber run squeezed under copper bundles will pick up bumps and kinks that flicker a link for months. Plan a separate route for fiber through a fiber distribution frame or a dedicated fiber tray, and keep connectors supported so nothing hangs off a ferrule. In dense racks, pre-terminated fiber patch cords with factory polish keep the back of the cabinet manageable.
Copper and power need distance for a different reason. Power cables carry strong currents at 50 or 60 Hz, and that field induces noise in data pairs. Rack and enclosure specialists recommend mounting power cables on the opposite side of the rack from data cables to keep that interference away from your signal.
Dual-power servers add one more rule. Servers with A and B power feeds must keep those feeds on separate paths with separate labels. Route both down the same channel and one careless pull of a bundle can kill both feeds at once, which erases the redundancy you paid for. A 1U PDU on each side, fed separately, makes the A/B split physical instead of hopeful.
Power cords deserve the same length discipline as data cords. A drawer full of three-meter cords behind short equipment creates loops that block fans and hide outlets. Cut or buy power cords close to the run, dress them along the rail they belong to, and label the outlet end so an engineer can kill the right feed without playing match-the-plug. Daisy-chaining power strips inside a rack is a fire-marshal conversation waiting to happen, and it starts with the same root cause: nobody planned the power route, so cords grew on their own.
Last, remember the back of the rack is a cooling zone. Rear exhaust needs open space. Cords stuffed behind equipment act like a wall, so route them along the frame instead.
A simple way to hold all three rules is to draw zones on the rack itself. Left rail and left vertical channel take power, fed from the A-side PDU. Right rail and right channel carry data, copper below, fiber above it. The middle of the cabinet stays empty, because that's where air and arms need to travel. Once the zones are drawn, every future cord has an address, and every technician who opens the door inherits the same map.
For a visual tour of how fiber, copper, and ODFs fit together in a real data center, this walkthrough from NexLayer Tech covers the same separation we just described, plus the troubleshooting payoff:
Video: Data Center Cabling Explained | Fiber, Copper, ODF & Troubleshooting, by NexLayer Tech (15:29, YouTube). Watch at: https://www.youtube.com/watch?v=yuEDOBTCM50
6. What Should a Rack Label Actually Say?
A label should tell you where a cable comes from and where it goes, on both ends, within 300 mm of each connection. Colors help, but colors are hints. A unique identifier per TIA-606-C is the system that survives staff changes.
Color coding is the habit most teams start with, and it's fine as far as it goes. Blue for business networks, red for management, green for storage. The problem shows up the first time two people define the colors differently, or a supplier delivers a cable in the wrong color. Color is a hint. It is not a system.
The format can be as simple as the two ends of one cord:
Switch end: SW01-P24, meaning switch 01, port 24.
Patch panel end: PP01-P24, meaning panel 01, port 24.
That's the whole idea: a label says where it comes from and where it goes. Bigger sites extend the same logic upward with rack numbers and panel numbers, so an identifier like 3-A02-14 reads as room or rack 3, panel A02, port 14.
Label location
What it shows
Example
Rack or cabinet
Site code and rack number
R03
Patch panel
Rack + panel number
R03-PP01
Panel port
Panel + port number
PP01-P24
Patch cord, both ends
Source and destination port
SW01-P24 ↔ PP01-P24
Power cord
Feed (A or B) and PDU + outlet
PDU-B-07
Write the labels for the next engineer, not for yourself. When the identifiers also live in a port table or topology document, a new hire can resolve a fault from the documentation without re-learning the rack. That's the management idea inside TIA-606: identifiers, records, and reports working together, so the knowledge lives in the system instead of one person's memory.
The physical label matters as much as the text. Wrap-around labels with a clear protective film resist the rubbing that fades handwriting in a year. Flag-style labels stand off the cord so you can read them without unplugging anything. Heat-shrink sleeves suit factory-terminated cords, because they survive handling for the life of the cable. Whichever style you pick, two habits keep labels alive: print them rather than hand-write them, and re-label immediately whenever a cord moves, because a label that points at the wrong port is worse than no label at all.
7. The Real Cost of a Messy Rack
Cable management accessories cost tens of dollars. Downtime doesn't. That asymmetry is the whole business case, and the numbers back it up.
Uptime Institute's annual outage analysis has reported for years that most outages cost more than $100,000, with a meaningful share passing $1 million. The same research tracks the human factor: operators attributing outages to human error report rates as high as 70 to 75 percent, and 2025's analysis found a 10-point jump in outages caused by failure to follow procedures.
Messy cabling feeds that error rate in three ways. It hides which cord feeds what, so changes get made on guesswork. It blocks airflow, so equipment runs hot and fails sooner. And it slows every repair, because troubleshooting starts with "which cable is this?"
The airflow bill has its own numbers. One unsealed rack can leak more than 100 CFM of conditioned air through gaps and empty U-space. Sealing firm UPSite modeled a high-density facility that recovered $11,450 per month, about $137,395 a year, just by sealing rack gaps with blanking panels. A low-density site still saved $30,594 a year.
Read that table once more from a purchasing angle. A full set of managers, straps, labels, and panels for one rack costs less than one hour of a serious outage. The hardware is never the expensive part. Skipping it is.
The hidden cost lives in everyday work, not just disasters. In a managed rack, adding one port is a five-minute job: read the label, follow the lane, patch, test, record. In a messy rack, the same job starts with twenty minutes of tracing and ends with a shrug and a note to clean it up someday. Multiply that tax across every move, add, and change in a year, and messy racks quietly charge your team a full week of engineering time. The bill never shows up as a line item, which is exactly why it survives budget reviews.
8. Which Cable Management Hardware Does Your Rack Actually Need?
Match hardware to three jobs. Horizontal managers sit between panels and switches. Vertical (zero-U) channels run down the rack sides. Securing gear, meaning hook-and-loop, combs, trays, and blanking panels, holds and protects the bundles. Buy for the cable count and bend radius you actually have.
Horizontal managers are the workhorses. A 1U 19-inch cable manager with finger ducts keeps cords sorted right where they leave the panel, and a 2U version buys more fingers for 48-port panels. The fingers matter: they keep each cord in its lane and stop a bundle from collapsing into a rope.
Vertical channels handle the highway traffic. Zero-U vertical cable routing runs in the dead space at the rack's sides, so it protects bend radii and never blocks the front-to-back airflow the equipment depends on. Deep racks carry 1-meter vertical managers that swallow the slack from dozens of cords.
Between racks, cable trays and runways carry the bundles overhead. Inside dense bundles, cable combs align cords before they get strapped, which is how data center crews get those perfectly parallel runs. And blanking panels close every empty U so air goes through the servers instead of around them.
Need
Hardware
What to check
Sort cords at the panel
1U/2U horizontal finger duct
Finger count vs port count, 1U per 2U of gear
Carry slack and cross-rack runs
Vertical zero-U manager, 1 m
Depth matches rack, covers full usable height
Route between racks
Cable tray or runway
Fill limit, bend radius at corners
Keep bundles parallel
Cable comb kit
Slot pitch matches cord diameter
Stop recirculation
Blanking panels
Snap-in fit, covers every empty U
Strap everything
Hook-and-loop rolls
Reusable, no crush
One rack usually needs all six. A 42U cable management cabinet with double-opening doors makes all of it easier to reach, which matters more than it sounds: hardware that's annoying to reach doesn't get used. For tool specifics, our cable arrangement tools guide covers the hand tools that finish the job.
Sizing it to a 42U build looks like this. Four panel rows and four switch rows want five or more horizontal managers, which fits the 1U-per-2U rule. Two vertical channels, one per rail, at the full usable height, catch every drop of slack. One overhead runway position per bundle direction, one comb kit per crew, hook-and-loop by the roll rather than by the pack, and one blanking panel per empty U. Order managers and panels together, because the finger count only makes sense against the port count it serves. And buy the next size of vertical channel: slack always grows faster than the plan says it will.
9. How Do You Clean Up a Rack That's Already a Spider Web?
Work zone by zone, one cable at a time: confirm where it goes, label both ends, then reroute it. Never pull a whole rack apart in one go. Remove dead jumpers completely, and update your records as you go.
The tempting move is the big bang: unplug everything one Friday night, re-cable the rack clean, and be a hero by Monday. Resist it. One full re-patch can take down services nobody remembers are on those cords, and half-remembered reconnects create a new mystery rack. We've heard that story more than once.
The safe method is slower and surer. Pick one zone, usually one switch. Start from the patch panel side and trace toward the switch, because the panel's ports are the map. For every cord, confirm the link, label both ends, then reroute it along the planned path. One confirmed, one labeled, one rerouted. Then the next.
If you inherit a rack with no records at all, build the map first and reroute nothing. Spend one session confirming every panel port to its destination and writing the port table as you go. That session feels slow, and it's the highest-value hour in the whole project, because every later decision borrows from it. A rack can be ugly and recoverable; a rack that's ugly and undocumented is the only kind that has to stay that way.
Unknown cords get tagged, not cut. A cord you can't identify might be feeding something critical, so mark it "unconfirmed" and come back with the port table. Cut nothing until its identity is certain.
Expect the cleanup to shrink the problem before you solve it. Spider web racks are usually full of dead cords: jumpers left from retired gear because nobody dared to pull them. Pulling confirmed-dead cords and stray power leads is asset cleanup, and it often clears half the visual mess before any real re-cabling starts.
Two things make the work stick. Test every moved link before you call the zone done, and update the topology and port records as you finish each one, not in a heroic documentation session at the end. The three cabling methods, waterfall, reverse, and forward, decide how the rerouted cords physically get dressed, and our patch panel termination walkthrough covers the termination and testing detail.
The finish line is simple to state. Hand the rack to an engineer who has never seen it. If they can read every cord's story from the labels and records, the cleanup is done.
A few field habits make the slow way faster. Book the zone as a short maintenance window instead of an all-nighter, because tired hands unplug the wrong cord. Bring the port table printed, plus hook-and-loop, labels, and a tester, so each confirmed cord goes all the way home in one visit. And agree on a rollback rule before you start: any cord you can't confirm within a few minutes gets tagged and left alone, because guessing during a cleanup is how outages get scheduled. Cleanup teams that follow those three habits usually finish a switch zone in one window, with zero surprises in the morning.
10. What Changes When Racks Go AI and High-Density?
The rules stay, the tolerances shrink. High-density racks run MPO trunks with tight bend limits, fat DAC bundles, and rear exhaust that must stay clear. Support heavy trunks at least every 2 meters and route fiber through vertical channels, never across the airflow.
An AI training rack in 2026 concentrates what used to fill a row. Every GPU server brings copper power, management copper, and a stack of 400G or 800G optics, with MPO patch cords carrying most of the fiber. Where a classic rack dressed 24 cords per panel, an AI rack may pass hundreds of fibers through the same vertical space.
Fiber sets the tolerances. High-density designs lean on bend-insensitive fiber and low-loss MPO connectors that tolerate radii near 7.5 mm, which lets trunks turn tighter corners without losing light. The management consequence: fiber gets protected channels and supported radii, not the "grab and go" treatment copper shrugs off.
The hardware rules scale up too. NVIDIA's DGX SuperPOD cabling guide tells integrators to support cable bundles at least every 2 meters, keep them out of walk paths, and never route them where they block equipment access. Those are AI-grade versions of the same rules in this guide.
Inside the rack, DAC and AOC cables handle the short switch-to-server hops. They're thick and stiff, so they want planned slack and gentle corners, exactly like copper but at a larger scale. Slim 28AWG copper patch cords claw back space where density peaks: the same circuit in a thinner jacket leaves room for airflow and for the next cord. A good MPO cable selection plan decides trunk lengths before the rack ships, and keeping one spare trunk per type on the shelf turns a failed link from an emergency into a five-minute swap.
That last point is where we live. As a manufacturer of the chips, transceivers, and cords inside these racks, we pre-terminate and label cables to measured lengths before they leave the factory, because a rack with 500 fibers is not the place to discover a cord is one meter short.
One more design choice shapes the cabling: where the switches sit. Top-of-rack layouts keep every run inside one cabinet, so cords stay short and the rack stays self-contained. End-of-row or middle-of-row layouts push more traffic through longer trunks and overhead pathways, which makes trunk support and bend protection the stars of the install. Neither is wrong. But the cabling plan must match the choice, because a top-of-rack discipline applied to an end-of-row rack, or the reverse, is how dense racks turn into expensive knots.
11. A 10-Step Server Rack Cable Management Routine You Can Copy
Here's the whole guide compressed into a routine you can run on the next install or retrofit. The steps run in order on purpose: every decision early in the list removes a class of problems from every step after it.
Map before you touch. Draw the rack layout and cable routes from the topology. Know every link you're about to disturb.
Place panels next to switches. Pair each panel with the switch it feeds, and reserve a horizontal manager position between every pair, 1U per 2U of gear.
Split power from data. Power on one side, data on the other, A and B feeds on separate paths with separate labels.
Give fiber its own road. Dedicated fiber route, protected radii, connectors supported, nothing stacked on top.
Cut cords to the path, not the floor. Measure along the actual route, then add a service loop stored in the vertical channel.
Bundle with hook-and-loop. Firm but not crushing, with trunks supported at least every 2 meters.
Label both ends within 300 mm. Source and destination on every cord, logged in the port records.
Test every link. No zone is done until each moved cord passes its test.
Seal the empty U. Blanking panels in every unused slot, so air goes through the gear.
Close the loop on every change. Update records and labels the same day. Audit the whole rack once a year.
And five mistakes that undo the rest of the work:
Cinching zip ties like cable clamps. One tight tie can deform pairs the tester finds months later.
Stretching cords dead straight. No slack means pulling forces land on connectors the first time equipment moves.
Sharing one channel for power, copper, and fiber. It saves seconds today and costs you noise, kinks, and confusion for years.
Labeling only one end. An end label without its partner is a riddle, not an identifier.
Leaving dead jumpers in place. Every retired cord left behind is one more line in the next engineer's puzzle.
Print this section, tape it inside the cabinet door, and it works even when memory doesn't. That's the final test of a routine: it has to survive the busy Tuesday, not the well-planned Friday.
12. Conclusion
Server rack cable management is a system, not a cleanup. The rack stays readable when layout, straps, labels, hardware, and records all hold their line.
The numbers make it checkable. Panels next to switches with 1U of management per 2U of gear. Labels on both ends within 300 mm. Bend radius at 4x for copper and 10x for fiber. Support trunks every 2 meters. One unsealed rack leaks 100+ CFM, and blanking panels have paid back $137,395 a year.
But the rule that decides everything is the discipline under change. Racks stay clean when every new cord follows the plan, every label gets written the same day, and every record gets updated before the door closes.
If you're speccing a new rack or rescuing an old one, we build the parts the system runs on: cabinets, patch panels, cable managers, and patch cords in copper and fiber, pre-terminated and tested. Send us an inquiry through the form below, tell us your rack count and port density, and we'll quote the layout with free samples.
13. Frequently Asked Questions
Q1:What is the best way to organize cables in a server rack?
Plan the layout before touching a cord, then work the plan: patch panels directly above or below the switches they feed, a horizontal cable manager between each pair, and vertical channels on the rack sides for every bundle. Route power opposite data, give fiber its own path, strap with hook-and-loop, and label both ends of every cord within 300 mm. The plan-first habit matters more than any single tool.
Q2:Is it better to use Velcro or zip ties for network cables?
Hook-and-loop straps are the better choice for data cabling. Zip ties cinch down hard, and an over-tight tie deforms the twisted pairs inside a Cat6 cable, which can degrade return loss and cause intermittent faults. Hook-and-loop holds bundles firmly without crushing, and it opens and closes cleanly for the next change. If you must use zip ties, cinch them just enough to hold the bundle without digging into the jacket.
Q3:Does cable management actually affect cooling?
Yes, in measurable ways. Bundles stuffed behind equipment block the exhaust path, and empty rack slots let cold air leak away instead of cooling servers. One unsealed rack can waste more than 100 CFM of conditioned air, and UPSite modeled savings of up to $137,395 per year at a high-density site purely from sealing gaps with blanking panels. Clean routing plus blanking panels keeps air moving where it's designed to go.
Q4:What length patch cords should I use in a server rack?
Use cords cut to the actual route: from the panel, through the horizontal manager, along the vertical channel, to the switch port, plus a small service loop. Cords far longer than the route create coils that block airflow and hide labels; cords too short pull on connectors when equipment moves. For dense racks, slim 28AWG cords reduce bulk, and factory pre-terminated cords in measured lengths remove the guesswork.
Q5:How often should rack cabling and labels be audited?
Audit labels and records after every change, the same day the change happens, so the documentation never drifts from the rack. Then run a full audit once a year: verify each label at both ends, remove dead jumpers, check strap tension and bend radii, and confirm blanking panels are still seated. Racks that get same-day updates rarely need heroic cleanups later.