The server rack serves as the essential core element of the entire
rack mount cable management, housing all critical equipment. As such, it is imperative to implement standardized wiring,
server rack mount cable management, and equipment installation to ensure optimal equipment performance, simplify maintenance, and facilitate easy access to the
server rack's interior.
However,rack mount cable management is often a challenging task for many engineers, and rack mount
patch panels are now the primary type used in
data center cabling closets. Thus, organizing cables is an integral part of rack mount cable management. Properly managing
server racks has also become an important factor in enhancing enterprises' competitiveness. Today, we will summarize a easy guide for rack mount cable management in server racks.
I. Principles of rack mount cable management
-
Organize
network cables according to the network topology and the current equipment setup.
-
Separate power cables and network cables as a general rule.
-
Place equipment appropriately to avoid overcrowding, excessive height or low placement, and close proximity between devices.
-
Label devices with numbers if there are too many within the
network cabinet.
-
Clearly mark the source of each cable at an appropriate position.
-
Use distinct identification methods for different types of cables (e.g., general
network cable types, crossover cables, dedicated lines).
-
In summary: A clear layout, organized cable sequencing, accurate labeling, and easy maintenance.
II. Steps for rack mount cable management
2.1. Preparation
-
Inform users in advance to ensure that organizing the
server rack does not disrupt their normal work.
-
Draw a routing diagram and equipment layout based on factors such as network topology, current equipment conditions, number of users, and user grouping.
-
Prepare necessary materials:
network patch cords, sticky notes or adhesive labels, and various sizes of plastic zip ties.
2.2. Organizing the Server rack
(1) Installing the server Rack:
Perform the following steps:
- Use screws and nuts included with the server rack to secure the frame firmly in place.
- Tilt the server rack and install the movable wheels.
- Adjust or add brackets on the frame according to equipment placement requirements.
(2) Arranging Cables:
Group
network cables; typically, groups are fewer than or equal to the number of
cable managers at the rear of the server rack. Bundle all equipment power cords together and insert plugs through access holes in the rear panel into their respective devices via a designated
cable manager.(3) Securing Equipment:
Adjust brackets within the server rack so that administrators can observe device operation without needing to open server rack doors. Add brackets as necessary based on device size and quantity while leaving adequate gaps between brackets for airflow and accessibility. Place all switches and routing devices according to pre-drawn diagrams.
(4) Labeling Network Cables:
Once all
network cables are connected, label them using prepared adhesive labels by wrapping them around each cable and marking them with a pen (typically indicating room numbers or their intended purpose). Labels must be simple and easy to understand. Use different colored labels for crossover cables to distinguish them from regular ones. If there are many devices, categorize them systematically with numbered labels.
Ⅲ. Techniques in rack mount cable management
Before installing cables, each one should be labeled with its starting point and information point number. Inside the data center, cables must be neatly routed from the room's entry point to their termination at a patch panel
keystone module. Flexible fasteners or cable ties should be used to ensure horizontal and vertical alignment without crossing over one another. This arrangement not only meets electronic device wiring requirements but also ensures that every corner is properly secured with an appropriate bending radius while maintaining alignment. All cables entering a server rack must pass through designated entry points at either the top or bottom of the server rack. Similarly, for cross-rack cabling, cables must also use these top or bottom entry points.

Cables entering a server rack via cable trays from above or below must be routed smoothly without crossing paths. They should be guided into
patch panels along vertical posts on both sides at the back of the server rack - either upward or downward as needed. Within each layer of patch panels inside a server rack, cables should follow a uniform arrangement with all bundling operations kept within a single plane.
3.1 Tools Required Before Starting
Essential tools include
network cable organizers, clips, ties, labels, cable termination tools, and a custom-made cable management chart that outlines all device installation locations and cable entry points within the server rack. This chart ensures that cables can be systematically bundled according to pre-planned positions upon entering the server rack.
3.2 Cable Entry Procedure
After cables enter the server rack:
- Based on patch panel or switch placement inside the server rack, route cables sequentially from topmost patch panels downward.
- Position cables for each patch panel using a cable organizer.
- Pass each cable through an organizer slot in sequence; bundle them every 20cm and secure them onto cable tie mounts inside the server rack.
- Maintain consistent positioning during bundling; avoid having any cables shift from outer layers inward.
- Ensure that ties are neither too loose (causing shifting) nor too tight (damaging cables).
3.3 Trimming Excess Cable
When bundles reach mounting brackets behind patch panels:
- Secure bundles onto brackets.
- Pair adjacent cables at their roots based on connection order.
- Measure individual cable lengths according to pre-determined routing paths (allowing for termination length).
- Trim excess lengths; affix new labels post-trimming onto bent sections while ensuring consistent height and orientation across labels.

3.4 Termination & Testing
Terminate trimmed cables into patch panels carefully:
- Use precision when punching down modules to avoid improper connections.
- If unsuccessful terminations occur during punching down, handle carefully to prevent repeated stripping or damaging wires.
After completing terminations:
- Test all network points individually to confirm proper communication at each location.
Ⅳ. Functions & Usage of Patch Panels in rack mount cable management
Patch panels are key components of structured cabling systems that connect vertical backbone cabling to horizontal cabling subsystems while linking
network wires with devices like switches.
Without patch panels:
Directly connecting front-end information points to switches can result in disorganized setups prone to errors such as port damage due to repeated insertions/removals during user changes or expansions.
Patch panels resolve these issues by enabling quick reconfiguration via
patch cord wires while maintaining tidy workspaces free from cluttered cabling.
Common Types
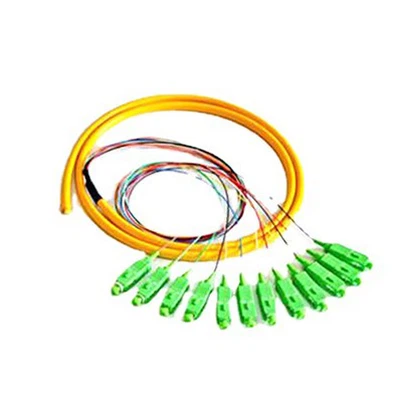
4.1 Network Patch Panels:
-
Typically available in configurations like 24-port or 48-port models for
Cat5e/
Cat6 Ethernet cables (shielded/unshielded options).
.")
-
The most commonly used
voice patch panels are the 100-pair type, which come in configurations of 25-pair, 50-pair, 100-pair, and 200-pair. The 110 voice patch panel is mainly used for terminating, installing, and managing voice cables in wiring rooms and equipment rooms.

-
As a key component of structured cabling systems, the 110 patch panel serves the functions of flexible signal transmission, allocation, and centralized management. The setup of the 110 patch panel depends on the number of large cable pairs. For example, if there are 70 voice connection points at the front end, you would need to lay a 100-pair large cable and set up a corresponding 100-pair 110 patch panel.
A fiber optic distribution frame should accommodate the highest core count of cables used in a central office setup. Whenever possible, multiple interrelated cables should be consolidated into one frame to facilitate optical path allocation. Additionally, the capacity of the distribution frame should correspond to standard cable core counts to minimize or eliminate waste caused by mismatched capacities during usage.
(2) Functional Categories
As terminal equipment for optical cable lines, fiber optic distribution frames should possess four basic functions:
Fixation Function:
After an optical cable enters the frame, its outer sheath and reinforcing core must be mechanically secured, grounding protection components installed, terminal ends protected, and the fibers grouped and safeguarded.
Splicing Function:
After the fibers extracted from the cable are spliced with
pigtails, excess fibers are neatly coiled and stored, and splicing joints are protected.
Distribution Function:
The connectors attached to
pigtails are plugged into adapters to achieve optical path alignment with connectors on the other side of the adapters. Adapters and connectors must allow flexible insertion and removal; optical paths can be easily reconfigured and tested.
Storage Function:
The frame should provide storage for various cross-connected patch cords between racks, allowing them to be organized neatly and systematically. The interior of the frame should offer adequate space and suitable cable routing options to ensure streamlined cable management that facilitates adjustments while meeting minimum bend radius requirements.
Ⅴ. Functions & Applications of rack mount cable management Accessories
4.1 The Role of Cable Organizers:
Cable organizers are accessories installed in conjunction with racks and patch panels to ensure that cables enter the patch panel smoothly and in parallel. This makes the cabling within the rack more organized and visually appealing. The configuration of cable organizers depends on the number of patch panels and switches in the rack. Typically, one cable organizer is installed between two patch panels, two switches, or a combination of one patch panel and one ethernet switch.

4.2 The Role of Cable Management Panels:
Cable management panels are essential tools for proper cable arrangement. They can be custom-made on-site using fiberboards, laminated boards, or wooden boards. These panels help organize cable sequences and secure cables in place. When
twisted-pair cables are threaded through the management panel, their relative positions are stabilized, making it easier to bind them without significant misalignment or crossing of cables.

4.3 The Role of Cable Clamps:
Cable clamps, also known as cable holders, wire clamps, or cable fasteners, are devices used to secure cables in place. Using cable clips during installation allows for easy layering and grouping of various cables. Once installed, they keep wiring neat and aesthetically pleasing while ensuring good heat dissipation. They resolve issues related to cable crossing and interference during installation while distributing cable weight more evenly to prevent excessive pressure on individual cables, thereby reducing the risk of damage and extending their lifespan. They also help reduce fire risks. Additionally, they allow for easy removal or reinstallation without disturbing existing wiring, which is often a limitation of traditional cable securing methods. Newer models of cable clips enable convenient replacement or adjustment of wiring while maintaining an organized and visually appealing layout.

4.4 5-Pair 110 Punch Down Tool:
This tool is a simple yet efficient device designed for terminating wires onto 110-type terminal blocks. It is ideal for connecting blocks in 110 patch panels and can simultaneously terminate up to five pairs of wires at once, making it suitable for tasks involving cables, patch cord blocks, and patch panels. Both the termination tool head and base are replaceable, while its blade can be flipped to choose between cutting or non-cutting options during use. The tool's housing is made from high-strength aluminum coated with black protective paint, and its handle is made from non-slip rubber.
How to use the punch down tool: Place the module onto the punch down tool's head, align it precisely with the connection posts on the 110 patch panel, then press down firmly until you hear a click, indicating that a module has been terminated successfully. Note: Before pressing down, ensure that the punch down tool is level with the connection posts on the patch panel; otherwise, it may damage both the posts and the module.


4.5 Single-Pair 110 Punch Down Plier:
This tool is suitable for connecting wires to 110-type modules and patch panels. To use it, simply push its handle downward to secure the wire into the module slot quickly and efficiently.

How to use: First arrange wire cores onto the module according to their sequence; then begin pressing down using the punch down tool while ensuring its orientation is correct (the blade side should face toward the wire ends). After pressing down, any excess wire core will be trimmed by the blade automatically. If oriented incorrectly, however, it may cut or damage functional wires instead of trimming excess ones. Always hold the punch down tool level with respect to the module; once aligned properly, press downward firmly until you hear a click. At this point, blades within the patch panel will pierce through each wire's outer insulation sheath effectively securing them in place.
Ⅵ Notes on Labeling Standards & Custom Charts in rack mount cable management
The purpose of labeling in structured cabling is to make future maintenance and management as convenient as possible for users, improve management efficiency and work productivity, and save time on network configuration. The most commonly used cable labels are labels with protective film covers. These adhesive labels feature a transparent protective film that shields the printed text from wear. In addition to these, individual cables or patch cords can also use non-film labels, flag-style labels, or heat-shrink sleeve labels.
6.1 Cable Numbering Guidelines:
When numbering cables, it should follow logical, hierarchical, and structural rules to clearly describe the cable's destination and ID. For example, for a network point in Room 1 on the 5th floor of a hospital building, the label at the server rack should read: "Building X - Floor 05 - Bed 1 - #01". Considering that hospitals may undergo renovations or rearrangements, writing only the bed number could cause mismatches later, so it's important to include the point number too. This number should match the number on the network panel. At the endpoint label of the cable, it should be: "Floor X - Server rack X - Patch Panel #X-01#". If there is only one server rack and one patch panel per floor, it can simply be written as: "Patch Panel #01-01#".
For patch cord numbering, it should clearly indicate the device number and port where it is connected. For example: if a patch cord connects Port 1 of Patch Panel #1 to Port 1 of Switch #1, at the switch end it should be labeled: "To Patch Panel #1-01", while at the patch panel end it should be labeled: "To Switch #1-01". In server rooms with multiple racks where inter-rack patch cords are present, the server rack number must also be indicated-for instance: "To Server Rack X - Switch X - Port XX".
6.2 Creating a Custom Cabling Table
In a structured cabling system, before beginning cabling work, each point should be numbered on blueprints so we can identify which cable corresponds to each location. When connecting network cables to patch panels, they should be connected based on their respective functions and areas into different patch panels. Before organizing cables, we must first determine which points connect to which patch panels for quicker and more efficient cable organization. This requires creating a custom cable management table. The cable management table should clearly indicate each cable's corresponding area and the location of connected equipment (see diagram below; example based on hospital inpatient wards).
")
Ⅶ. Introduction to rack mount cable management Crafts
7.1 Waterfall Cable Management Method
This is a relatively old cable management style that can still occasionally be seen. It draws inspiration from the artistic imagery of the "Water Curtain Cave in Mount Huaguo," where twisted-pair cables are allowed to hang directly from the modules on the patch panel, creating a neatly arranged, layered appearance with each layer comprising 24–48 twisted-pair cables.
Even today, some distribution cabinet rear panels adopt the waterfall cable management technique, where cables are left untied, hanging freely from the rear of the patch panel to the floor. The advantage of this approach is that it saves labor and helps reduce crosstalk between cables.
The waterfall cable management method is one of the most common approaches to cable organization. It uses nylon cable ties to fasten cables onto the rack cabinet's vertical posts or crossbars, prioritizing practicality over appearance and ensuring sufficient space in the middle for network equipment.
However, this method has several disadvantages:
- Installing network equipment may disrupt the arrangement or even make it difficult to properly position the equipment.
- The weight of each twisted-pair cable exerts a pulling force on the rear of the module. If no bundling is done before termination points, this pulling force could eventually cause separation between the module and twisted-pair cable over months or years, leading to disconnection faults.
- If a keystone jack within such a patch panel requires re-termination, maintenance personnel must work within this "water curtain," often surrounded by dozens of twisted-pair cables. Additionally, since rack cabinets typically lack internal lighting, it becomes challenging to see clearly during termination, increasing the likelihood of errors.
7.2 Reverse Cable Management
Also known as backward cabling, reverse cable management refers to organizing cables only after they have been terminated on patch panel modules and successfully tested. The process begins at the module end and moves outward toward the rack cabinet while also organizing cables within tray systems.
The advantage of this approach lies in avoiding re-cabling caused by failed tests on individual
twisted pairs. However, its drawback is that fixing both ends (the entry point and patch panel) beforehand inevitably results in clusters of disorganized cables at certain points within the room-typically at the bottom of rack cabinets.
Reverse cabling relies solely on manual effort through visual inspection and physical handling for organization. Due to extensive cabling inside rack cabinets crossing and intertwining during routing, this method consumes significant time and limits efficiency improvements.
The primary advantage is that testing has already been completed, so there's no need to worry about cable length adjustments at the rear side of rack cabinets. However, with both ends fixed in place, numerous intersections form between cables, complicating efforts to arrange them neatly; moreover, there will inevitably be sections where
twisted pairs appear tangled-either underfloor (for bottom entry) or above ceiling tiles (for top entry).
7.3 Forward Cable Management
Forward cable management, also known as feed-forward cabling, entails organizing cables prior to their termination on patch panels. This method typically starts at a room's entry point (or for inter-rack scenarios: from one rack cabinet's patch panel onward), organizing cables in segments until reaching the rear side of patch panel
keystone modules. Termination and testing follow afterward.
The goal of forward cabling is as follows: Horizontal bundles of twisted-pair cables extending from room entry points (or designated network zones within rooms) to distribution cabinets are grouped into units corresponding to 16/24/32/48-port patch panels; all twisted pairs within each bundle remain parallel (short-distance parallelism does not affect overall performance since crosstalk is mitigated as most cable lengths are loosely arranged within trays or conduits). Bundles themselves also maintain parallelism; once inside rack cabinets' interiors, bundles bend naturally toward respective patch panels while preserving internal parallelism throughout their routing paths up until reaching individual module connections at panel rears-where specific wires corresponding with each module are extracted from bundle bases for verification before being secured onto support brackets behind modules or inserted directly into modular slots on panels.
The primary advantage lies in ensuring tidiness at every point along cable pathways while preventing any intersections among lines. However-and critically-if damages occur during initial routing stages affecting any given line(s), subsequent testing failures necessitate complete re-cabling efforts later downline processes require assurance over material quality upfront alongside meticulous handling practices during execution phases.
Ⅷ Forward Cable Management Process in rack mount cable management
During the forward cabling process, the use of appropriate cabling materials is essential, along with cable management boards and cable management charts. When combined with proper cabling techniques, this ensures an outcome that is visually neat, reliable, efficient, and adaptable for future needs. Below is an introduction to the basic construction process for forward cabling using the most common right-in-top-out method:
8.1 Fix the patch panel in place,
Install the bracket at the back, and insert labeled
network faceplate inserts with printed cable numbers into the front of the patch panel (or affix them onto the patch panel). If the modules of the patch panel are removable, they should be detached.
8.2 Positioning Cable Management Boards:
Before threading cables through a cable management board, orient it properly to avoid unnecessary twisting during the cabling process. Ensure that hole E1 on the board aligns naturally with module 1 without adjustment. At this point, holes 2-5 on the board should remain parallel to modules 2-5 on the patch panel. To position it correctly, place the board vertically behind module 1 with hole E1 facing module 1 (the side with text should face module 24). Hold the board and follow the intended cable routing direction toward the entry point of the machine room. Ensure only parallel movement occurs without rotation. Upon reaching the entry point, record hole A1's position to maintain consistent alignment for subsequent boards.
8.3 Threading Cables Through Cable Management Boards:
At the machine room entry point, adjust each board to its determined position as described in step 2. With the text side facing you, insert twisted-pair cables through corresponding holes from the non-text side based on their numbers listed in the cable management chart. Typically completed by two people: one person identifies and separates only those cables needed for this specific board while another threads them through their corresponding holes. All cables must pass entirely through their respective holes so that each board sits flush against its adjacent entry point, ensuring proper organization.
8.4 Routing Cables:
Bundle twisted-pair cables near their roots on each board's outer (non-text) side using Velcro ties or nylon cable ties after threading them through. Gradually slide each board along its designated path while bundling cables every 100mm to maintain order and prevent loosening of prior ties. Ensure bundles form a circular shape: external wires should align along each outer layer's perimeter while internal wires remain central within inner layers throughout transitions up to module 24 at far ends behind patch panels.
Continue sliding boards approximately every 200mm and repeat tie-bundling consistently without allowing internal wires to migrate outward or vice versa until reaching final positions along routing paths leading to target destinations within racks or enclosures.
8.5 Securing Cable Bundles:
While routing cables near tray holes or server rack mounting points, simultaneously secure bundles to infrastructure components such as trays or mounting brackets using additional ties to prevent downward slippage and maintain stability.
8.6 Bending Process for Corners:
When encountering bends during routing, ensure that the cable management board stays close to each bend while guiding cables smoothly around it-do not secure bundles before navigating corners. This prevents deformation caused by inner cables becoming overly taut and outer cables loosening at bends.
8.7 Cable Distribution at Patch Panel Brackets:
Once a cable management board reaches a patch panel bracket at the back of a rack, secure bundles onto the bracket before continuing forward movement. At each module along this path, secure bundles again and separate out corresponding cable numbers for that module. This step typically requires two people: one person separates cables while another pulls them from behind toward the front of the patch panel (if modules are removable, thread cables through module holes to reach their front). Both individuals should verify cable numbers aloud against
faceplate labels for accuracy.
8.8 Repeat Until Completion:
After completing one set of cabling for a 24-port patch panel using steps 1-7, return unused boards to the entry point and proceed with subsequent sets until all cabling is complete.
Cabling Multiple Patch Panels (Branch Cabling)
When multiple patch panels are installed within a server rack, organize cabling for each panel separately. Due to limited space on server rack tie boards (typically about 100mm wide), only 3–4 bundles of 24 cables can be secured side by side on a single tie board; server racks with an 800mm depth can accommodate up to two tie boards on one side but may not meet capacity requirements for bundling all horizontal twisted-pair cables (e.g., up to 200). In such cases, use secondary bundling methods: first combine smaller bundles into larger ones using an 8×8 management board (for up to 48 cables), then split these into two smaller bundles using a subsequent 5×5 management board before continuing routing toward patch panels.
The starting point for forward cabling can vary-beginning at server rack entry points, tray openings, machine room entrances-or even from workstation faceplates (though this is not recommended).
With the rapid growth of the internet industry and advancements in networking products like servers and
Ethernet switches, modern server racks must accommodate more devices than ever before. As equipment density increases, maintaining orderly server rack cable management within server racks becomes even more critical. Poorly planned or unsystematic cabling can lead to cable damage, extended replacement times, confusion for maintenance personnel during handovers, and in severe cases, obstruct airflow, causing overheating and equipment shutdowns.So Follow this guide will be the perfect solution.


.")