RJ45 Jack Module - The Ultimate Guide
Leave a message
"The RJ45 Jack Module - The Ultimate Guide."
The RJ45 jack module is a crucial component of modern networking infrastructure. It is used to connect devices to a network by providing a physical interface for data transmission. RJ45 jacks are ubiquitous in both residential and commercial settings, with their compact size and simple design making them a popular choice for many applications.
In this guide, we will cover everything you need to know about the RJ45 jack module, from its history and design to its installation and maintenance.
1. History of the RJ45 Jack Module
The RJ45 jack module was first introduced in the 1970s as part of the Ethernet standard. The Ethernet standard was developed by Xerox Corporation's Palo Alto Research Center (PARC) in the early 1970s, and it quickly became the de facto standard for networking.
The first Ethernet cables used a coaxial cable with a BNC connector. However, the introduction of twisted pair cabling and the RJ45 jack module revolutionized Ethernet connectivity.
The RJ45 jack module was initially designed to support Category 3 cabling, which had a maximum data transfer rate of 10 Mbps. However, as network speeds increased, so too did the capabilities of the RJ45 jack module. Today, RJ45 jacks can support Category 6a cabling, which has a maximum data transfer rate of 10 Gbps.
2. Design of the RJ45 Jack Module
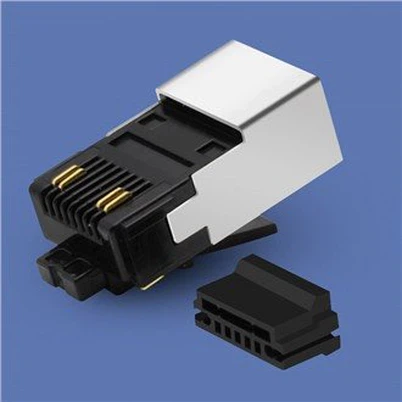
The RJ45 jack module is a small rectangular module that is typically made from plastic. It features eight metal contacts arranged in a row, with four contacts on each side.
The metal contacts are designed to make contact with the eight wires inside a twisted pair of cables. These wires are typically color-coded and arranged in pairs, with each pair twisted together to reduce electromagnetic interference.
The RJ45 jack module is designed to be inserted into a keystone wall plate or a patch panel. When installed, the jack module protrudes from the plate or panel and provides a physical interface for devices to connect to the network.
3. Installation of the RJ45 Jack Module
Installing an RJ45 jack module is a relatively straightforward process, but it does require some specialized tools and equipment. Here's a step-by-step guide to installing an RJ45 jack module:
Step 1: Prepare the cable
Start by preparing the twisted pair cable that you will be connecting to the RJ45 jack module. Use a cable stripper to remove approximately one inch of the outer jacket from the cable. Then, use a wire stripper to remove about half an inch of insulation from each of the eight wires inside the cable.
Step 2: Arrange the wires
Arrange the eight wires in the correct order. The standard wiring scheme for Ethernet cables is called T568B, and it is as follows:
Pin 1: White/Orange
Pin 2: Orange
Pin 3: White/Green
Pin 4: Blue
Pin 5: White/Blue
Pin 6: Green
Pin 7: White/Brown
Pin 8: Brown
Step 3: Insert the wires
Insert the eight wires into the RJ45 jack module in the correct order. Be sure to align the wires with the metal contacts inside the jack module.
Step 4: Crimp the jack module
Once the wires are inserted, use a crimping tool to secure the jack module to the cable. The crimping tool will press down on the metal contacts, making a secure connection with the wires inside the cable.
Step 5: Test the connection
Finally, test the connection to ensure that it is working correctly. You can use a network tester to check the connectivity and data transfer rates of the connection.
4. Maintenance of the RJ45 Jack Module
Regular maintenance is necessary to ensure that RJ45 jack modules continue to function properly. Here are some tips for maintaining RJ45 jack modules:
Regular cleaning
Dirt and debris can accumulate inside the jack module, causing connectivity issues. Use a dry, clean cloth or compressed air to remove any dirt or debris that may have accumulated inside the jack module.
Check for loose connections
Loose connections can cause signal loss and connectivity issues. Regularly check the connections to ensure that they are tight and secure.
Use high-quality components
Using high-quality components can help to ensure that the jack module continues to function properly. Use high-quality cables, connectors, and jack modules to prevent signal loss and other connectivity issues.
Monitor network performance
Regularly monitor network performance to identify any issues that may be related to the jack module. Use network monitoring tools to track network performance and identify any problems that may require attention.
5. Applications of the RJ45 Jack Module
The RJ45 jack module has many applications, including:
Residential networking
RJ45 jack modules are commonly used in residential networking applications, such as home offices, home theaters, and gaming rooms.
Commercial networking
RJ45 jack modules are also commonly used in commercial networking applications, such as office buildings, schools, and hospitals.
Audio and video
RJ45 jack modules can be used to transmit audio and video signals, making them a popular choice for home theater and commercial AV applications.
Industrial networking
RJ45 jack modules can be used in industrial networking applications, such as factory automation and control systems.
6. Types of RJ45 Jack Modules
There are several types of RJ45 jack modules, including:
Shielded RJ45 jack modules: These jack modules have a metallic shield that provides protection against electromagnetic interference (EMI).
Unshielded RJ45 jack modules: These jack modules do not have a metallic shield and are less expensive than shielded jack modules.
Keystone RJ45 jack modules: These jack modules are designed to snap into a keystone wall plate, allowing for easy installation and customization of network outlets.
Toolless RJ45 jack modules: These jack modules are designed for easy installation without the need for special tools.
Installation of the RJ45 Jack Module
Installing an RJ45 jack module requires some basic tools and knowledge of network cabling. Here are the steps to install an RJ45 jack module:
Prepare the cable: Strip the outer jacket of the cable, and separate the individual wires. Untwist each pair of wires and straighten them.
Arrange the wires: Arrange the wires according to the T568A or T568B standard, which is commonly used for Ethernet cabling.
Insert the wires: Insert each wire into its corresponding slot on the RJ45 jack module, making sure that the wires are fully inserted and in the correct order.
Trim the wires: Use a wire cutter to trim any excess wire that protrudes from the jack module.
Test the connection: Use a cable tester to ensure that the jack module is properly connected and functioning correctly.
Troubleshooting RJ45 Jack Module Issues
If you encounter connectivity issues with an RJ45 jack module, here are some troubleshooting tips:
Check the cable: Ensure that the cable is properly connected and not damaged.
Check the jack module: Check for loose connections or damage to the jack module.
Check the network equipment: Ensure that the network equipment, such as routers and switches, is functioning correctly.
Test the connection: Use a cable tester to verify that the connection is properly established and to identify any issues with the cabling.
Replace components: If necessary, replace any damaged components, such as cables or jack modules, to restore connectivity.
7. Conclusion
The RJ45 jack module is an essential component of modern networking infrastructure. It provides a physical interface for devices to connect to the network and supports high-speed data transfer rates. Proper installation, maintenance, and use of high-quality components are essential to ensure that RJ45 jack modules continue to function properly. With its simple design and versatile applications, the RJ45 jack module will continue to be a popular choice for networking professionals and enthusiasts alike.
To buy the high-quality COBTEL rj45 jack modules, you can click the purchase link.